Web Development for Kids: HTML!
.
17 minutes
I’m not sure why you want to learn HTML. Maybe you’ve heard that you need to learn it to build websites, or you heard one of your “tech friends” mention it in passing, whatever the reason–welcome to the HTML rush hour crash course, which would help you become an HTML master (whatever that means) on your commute to work…not really it won’t. This article is intended to be a cheat sheet to help with understanding what HTML is, what it does, and what you could possibly use it for.
What is HTML?
HTML stands for Hypertext Markup Language, Wikipedia describes HTML as “the standard markup language for documents designed to be displayed in a web browser”. HTML, among other things, is the semantic backbone of every web page you visit. HTML, CSS, and Javascript(ignore the other two for now), are the three major languages that are “understood” by the web browser. In fact, a website could just be one HTML file, cool huh? HTML was basically made to be a way to write things that browsers could read, understand and display.
Little Tidbit
The first public HTML specification was written in 1991 by Tim Berners-Lee, it described 18 HTML elements, 11 of which are still used to date. Enough talking, let’s create our first webpage.
Our First Webpage
Been feeling a bit down lately, maybe your friends don’t appreciate how cool you are, creating your first webpage might just be what you need to show them *4. On your Mac or PC, create a folder and call it whatever name you like. In said folder, create a new file called index.html. You could also use codepen to create your first webpage.
Little Tidbit
Most web servers when trying to display your website look for a file name index.html, making it a decent name for the first web page you create.
What should be on our webpage?
Considering you’re making this to show your friends how cool you are, you could write all the things you think make you cool on the page, right?
Editing Our Page
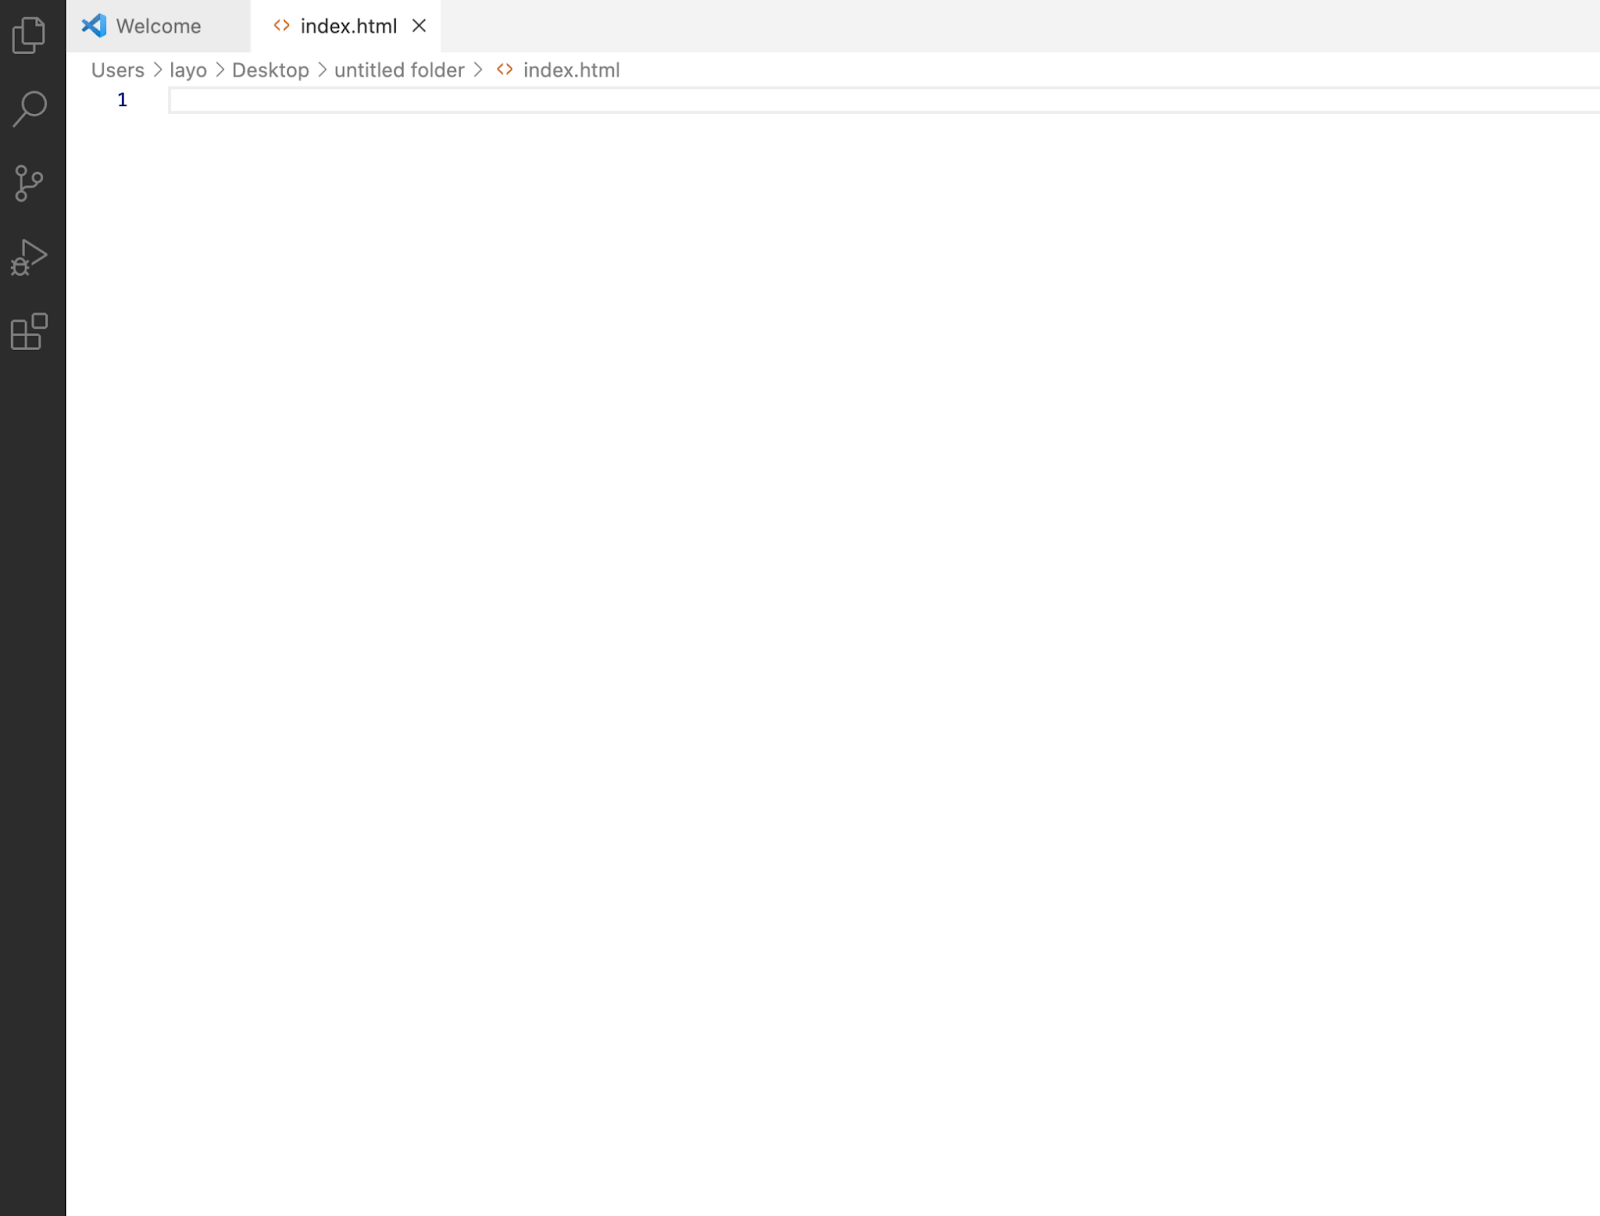
To open our page and edit, we can use various editors, including; Notepad, Notepad++ Sublime Text, VsCode, etc. To follow this crash course you can use whichever you like but we’d be recommending you use VsCode due to its popularity and beginner-friendliness (ps: the author is not a VsCode fan but still recommends it, it’s that good). Now open your file with VsCode, it should be empty; looking sth like this:
The next thing we’d do is add the Doctype, the Doctype basically tells the web browser that our page is an HTML page, and it also describes the kind of HTML page it is.
Little Tidbit
HTML has undergone different versions over the years, going from version 2(1995) to version 5 (2004, the current version we use) and each version has had its own slightly different doctype.
Let’s Code
Doctype
To add the doctype to the file, simply add <!DOCTYPE html> to the top of the file and you’re golden.
HTML Elements
HTML files are made up of HTML elements and each HTML element ideally comprises of an opening tag, a child element, and a closing tag. The element child refers to anything that is between the element’s opening and closing tag.

The image above describes an actual HTML element, the paragraph element, which opens with a <p> tag and closes with a </p> tag.
Most HTML elements are like the paragraph element here but some of them have “self-closing” tags, meaning, these tags don’t need a different tag to close them they open and close on the same tag an example is the input tag shown below.
PS: an element child usually could be anything, it could be plain text or other HTML elements. While there are general guidelines to follow for specifying element children (we’d touch on this in a bit), for the most part, anything could be a child of anything.
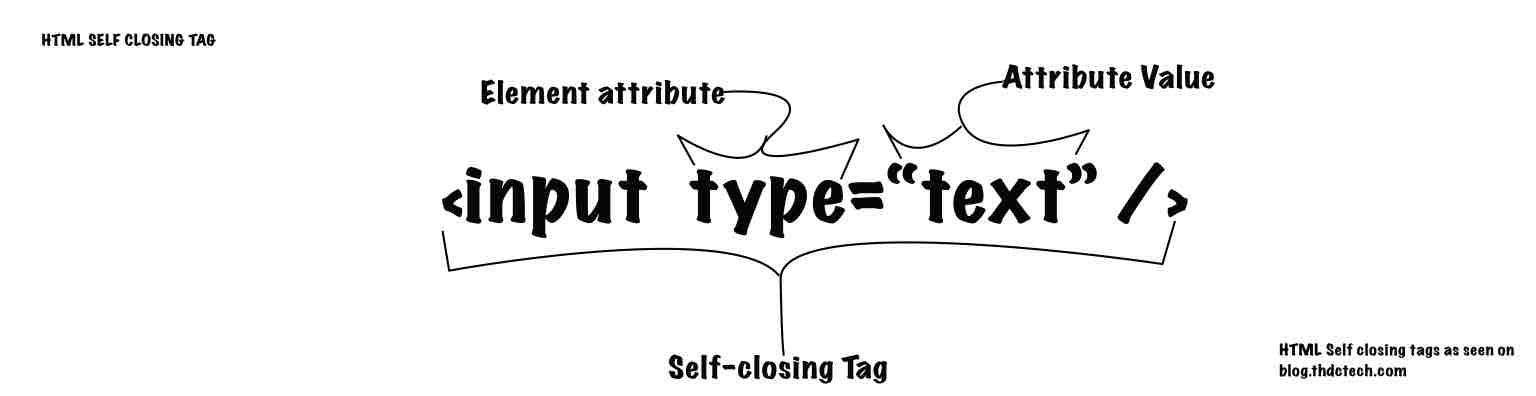
The image above shows what a self-closing tag, looks like. The element it describes is also an actual HTML element, the input element, usually used in forms and the like, we’d talk about it in-depth later. Also, due to the fact that self-closing tags don’t have the usual opening and closing tags, they cannot have children.
We are also introduced to the concept of element attributes. Element attributes are used to give HTML elements, their character, think of humans, we all have defining traits, some might call them “attributes” that make us unique, same goes for HTML elements.
To add an attribute to an element, you add a key=”value” pair to the element opening tag, or just its tag if it is self-closing.
The html Tag
The next tag to include in our HTML file after the doctype is the html tag, this basically is where all our HTML code will reside. To add the HTML tag update your index.html file to look like this.
<!DOCTYPE html>
<html lang="en">
<!-- html body -->
</html>
Little Tidbit
The line that reads <!-- html body —-> is called a comment. Comments are lines of code that your browser generally ignores, in HTML comments are written by starting with <-- adding the comment body, and then ending with -->. E.g. <!-- this is a comment —->.
Every other thing we are going to write in our HTML file is going to be a child of the <html></html> tag. We can see that this element has an attribute of lang with the value of en this tells our browser every child of this HTML element has its language in English.
The head tag
The first tag we are going to put in the HTML body is the head tag. This tag houses metadata for your HTML file, when we start talking about CSS/Javascript, we would include those files in the head tag. For now, let us add a title tag in there so it looks like so:
<!DOCTYPE html>
<html lang="en">
<head>
   <title>The Awesome Layo</title> <!-- my name is Layo -->
</head>
</html>
Since this is gonna be a bio of how awesome you are, you can make the title “The awesome <your-name>” as I did with mine. First, save the file(ctrl/cmd + S) then open the file in the browser by right-clicking on the file in Finder or File Explorer, and opening it with your favourite browser it should look something like this:
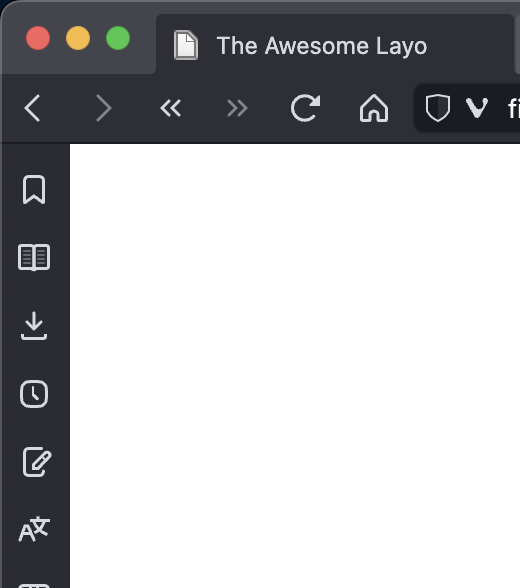
Checking the top of the browser tab, you should see ‘The Awesome <your-name>’ there; whatever you put in your title element is going to show up here.
The body tag
The next element we would be taking a look at is the body element. This element houses everything that is going to be displayed in your HTML page. Edit index.html to look something like this:
<!DOCTYPE html>
<html lang="en">
<head>
   <title>The Awesome Layo</title>
</head>
<body>   <!-- the body element -->
</body>
</html>
It has an opening and closing like most of the elements on our page and it’s going to house all we do from now on.
Big Tidbit: Indentation
In order to make your code as readable as can be, its always a good idea to indent properly, as you can see in the above code, the title tag is indented since its a child of the head tag, every child of every element should be indented from that element. Some people use 2 spaces/4 spaces for indentation, but I’d recommend using a tab.
Headings
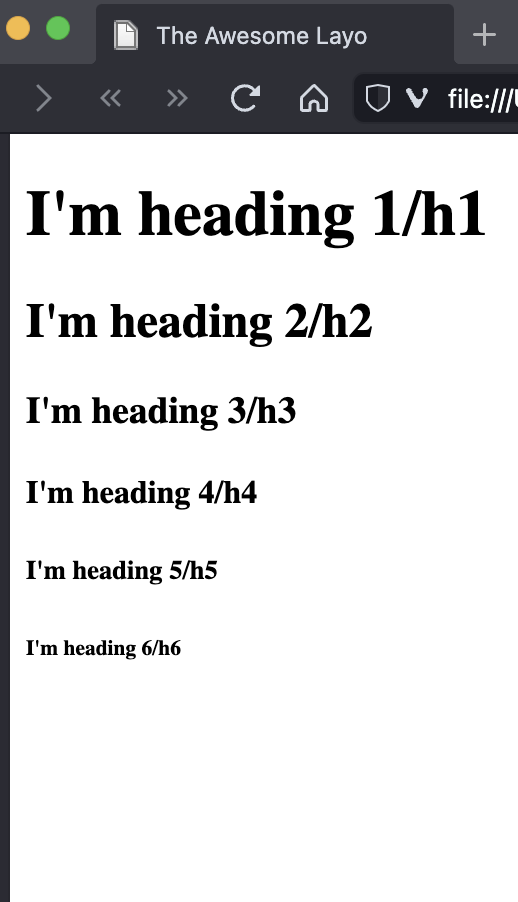
We have the heading tag, which is represented by h, and a number from 1 to 6. Just to demonstrate, let’s modify our code a bit to look like this:
...
<body>
   <h1>I'm heading 1/h1</h1>
   <h2>I'm heading 2/h2</h2>
   <h3>I'm heading 3/h3</h3>
   <h4>I'm heading 4/h4</h4>
   <h5>I'm heading 5/h5</h5>
   <h6>I'm heading 6/h6</h6>
</body>
Save and then check your browser for its result. It should look something like the image above. Now keep in mind the header levels(h1-h6) don’t just affect the size, they are used to order subheading under headings . Meaning a subheading for a h1 can be any heading below its level (h2 to h6), hence an h1 should not be below an h3 if it’s a subheading of h3. The same rule applies to other header levels.
If you just want a smaller or bigger heading, use css instead. For our web page, we’d need a heading to kick off our awesomeness, I’d make mine “The awesome Layo: A bio”, you can make your’s whatever you want, so the html body ends up looking like this:
...
<body>
   <h1>The Awesome Layo: A Bio</h1>
</body>
Paragraphs
The p tag is used to represent the paragraph element, here we can write multiple paragraphs. Here you could write a bit about yourself. I’d just put some Latin placeholders in mine for kicks so it looks like this:
...
<body>
   <h1>The Awesome Layo: A Bio</h1>
   <p>Lorem ipsum dolor sit amet consectetur, adipisicing elit.
Quibusdam cum non veritatis in reprehenderit, voluptatibus nam.
Distinctio enim fugit, eum, culpa sit quas
deleniti numquam laudantium repudiandae porro, saepe nobis!</p>
</body>
Lists
Next up, we should list things we are good at, HTML let’s us do that with lists. Html has two types of lists: ordered lists(represented with <ol></ol>) and unordered lists (<ul><ul>).
Each child of the list is an item in your list and its tag is the <li></li> tag. To see how it works, let’s try to list things we are good at, in order of how good we are at them 🙂 Below the paragraph element, we’d add the list.
...
<ol>
       <li>Swimming</li>
       <li>Fortnite</li>
       <li>Coding</li>
</ol>
Remember, the ol tag should be indented from the body, now, save and view your file, it should look something like this:
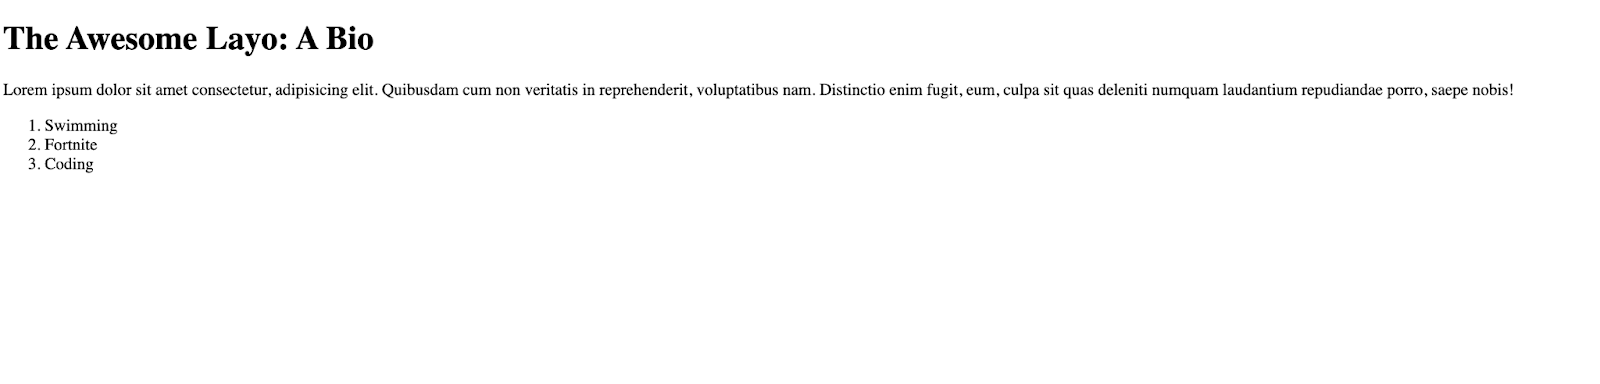
It seems a bit weird to just list things without a heading before, so let’s add an h2(because it’s a subheading for h1) before our list. So our code for the lists looks like this:
...
<h2>Things Layo is good at.</h2>
<ol>
    <li>Swimming</li>
    <li>Fortnite</li>
    <li>Coding</li>
</ol>
In our browser, it looks a bit like this:
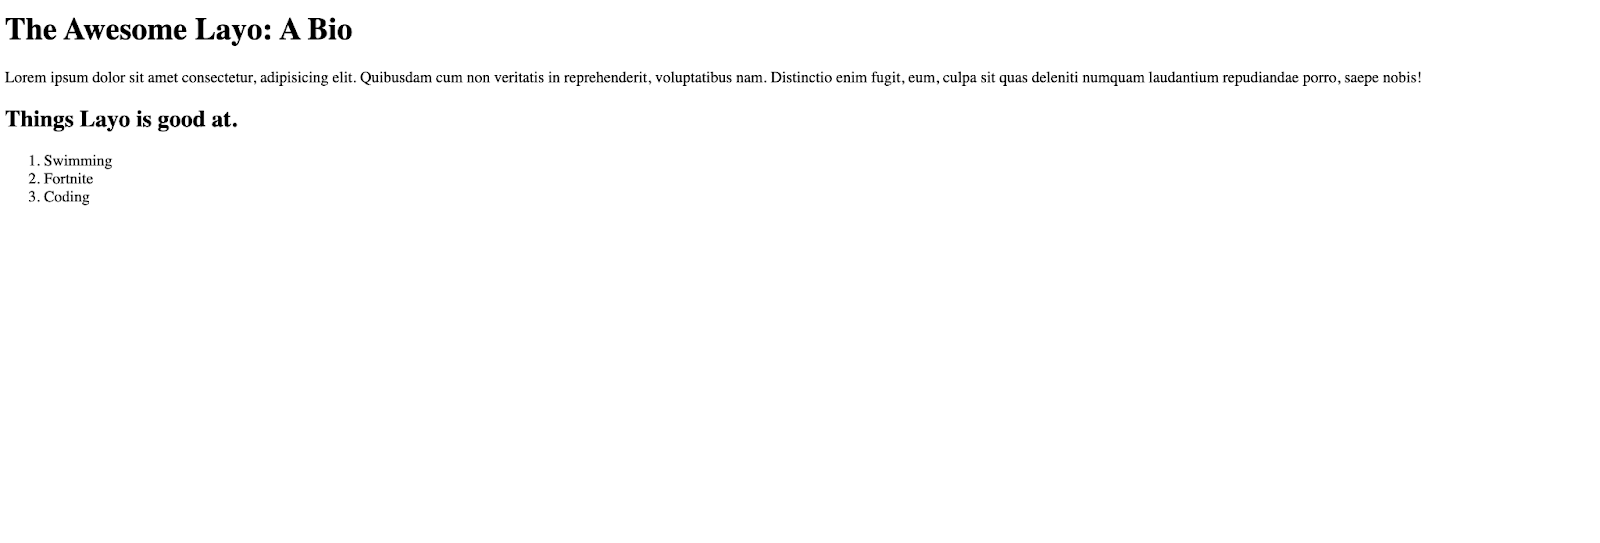
Say you’re not exactly sure about how good you are at some things, but you want to list them too, you can do that with the unordered lists (ul). Now let’s add the unordered list to new things were good at, and our code would look like this:
...
<h2>Things Layo is good at.</h2>
<ol>
   <li>Swimming</li>
   <li>Fortnite</li>
   <li>Coding</li>
</ol>
<ul>
   <li>Drinking (apple juice, I won three apple juice drinking contests) </li>
   <li>Skiing</li>
   <li>Sleeping</li>
</ul>
Save it and your browser page should look something like this:

Looking good smarty!
Images
Our bio seems to be missing something that lets others know it’s us, an image of us.
We can add that just after the first heading we wrote.
Adding an image is pretty simple:
Find an image from your computer,
Make sure it’s a png or jpg or even a gif is fine,
Rename it to “img.jpg”,
Move it to the folder where you created your index.html file.
Include it in your file with an <img /> tag- a self-closing tags
The tag is going to look like this:
...
   <img src="img.jpg" width="200" />
You can see that we added two attributes, src: this tells the browser where to find the file, in this case “img.jpg” Width: this tells the browser what width the image should be. There are better ways of specifying image size( using css) but for now we’d use the width. Add the image tag just after the first heading and the full code should look something like this:
<!DOCTYPE html>
<html lang="en">
<head>
   <title>The Awesome Layo</title>
</head>
<body>
   <h1>The Awesome Layo: A Bio</h1>
   <img src="img.jpg" width="200" />
   <p>Lorem ipsum dolor sit amet consectetur, adipisicing elit.
Quibusdam cum non veritatis in reprehenderit, voluptatibus nam.
Distinctio enim fugit, eum, culpa sit quas
deleniti numquam laudantium repudiandae porro, saepe nobis!</p>
   <h2>Things Layo is good at.</h2>
   <ol>
       <li>Swimming</li>
       <li>Fortnite</li>
       <li>Coding</li>
   </ol>
   <ul>
       <li>Drinking (apple juice, I won three apple
juice drinking contests) </li>
       <li>Skiing</li>
       <li>Sleeping</li>
   </ul>
</body>
</html>
while it should look like this in your browser:
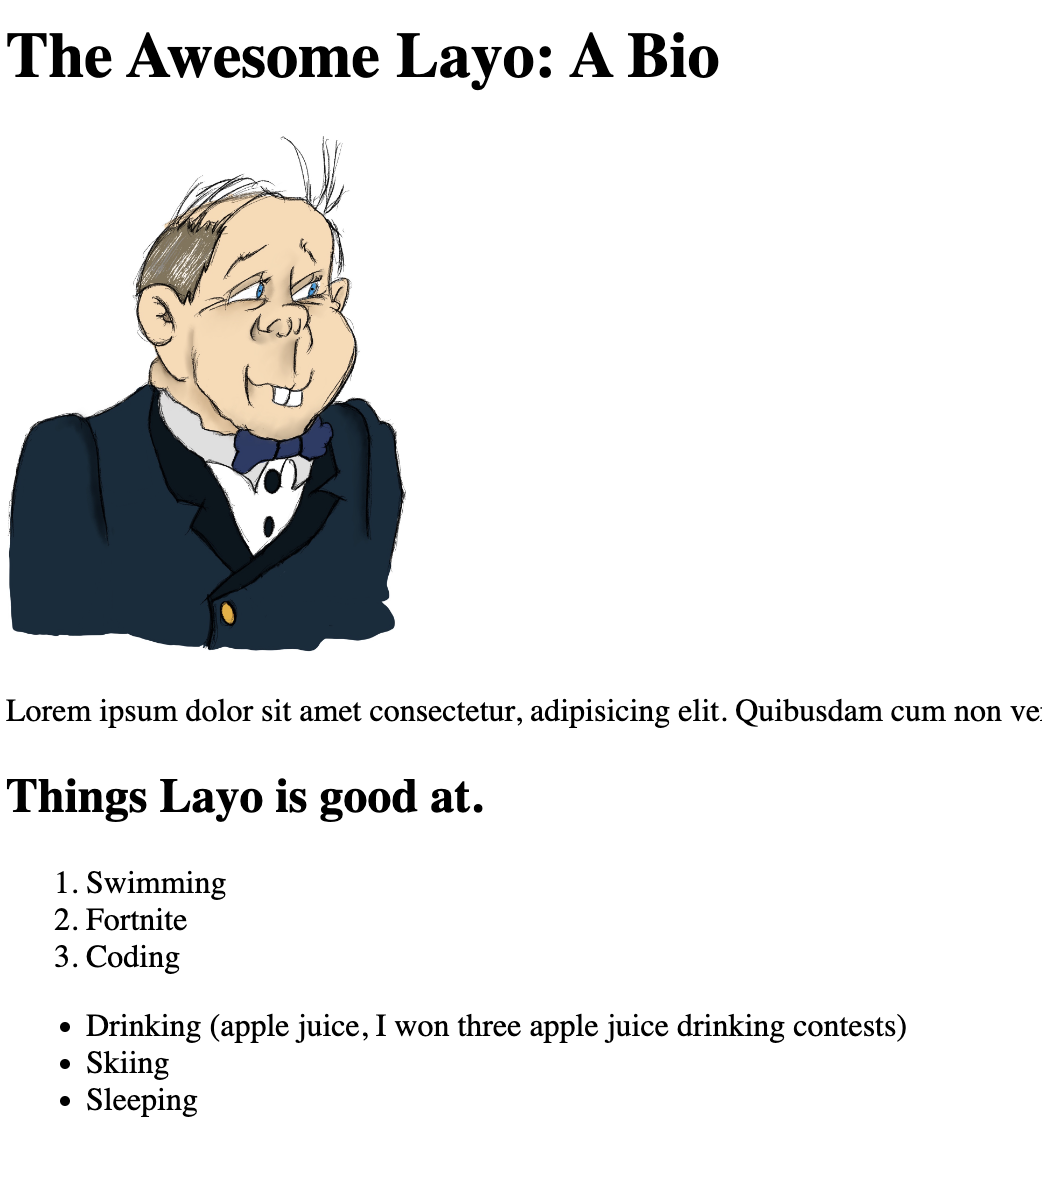
As you can see, I’m an old cartoon man 🙂 I actually drew that btw. Now the bio looks way nicer than when we first started.
Containers
Containers are like boxes… technically a box is a container but that’s beside the point. Containers in HTML do nothing except “hold” child elements, sometimes they render as a space and sometimes do not render at all. We have two types of containers, the block container and the inline container. Right now do not worry about what “block” or “inline” means, but keep it in mind since it’s going to be explained later on.
The Inline container
This container is the <span></span> element. It has a couple of uses, but one of them is to change how parts of a text look. Say you have a simple sentence in a paragraph element that looks something like this:
<p>Mrs. Heinkly was a rather stern woman.</p>
And you wanted to emphasize how stern she was by maybe putting the word stern in bold, a way to do that could be through the <span> element. You would modify your paragraph element to look like this:
<p>Mrs. Heinkly was a rather <span style="font-weight: bold;">stern</span> woman.</p>
If you view that piece of code in an html document and in a browser, you’d see the word “stern“ in bold. The style attribute lets us add css properties to HTML elements “in-line”. The value of the “style” attribute attached to the span element- “font-weight: bold”-, is css lingo for telling the browser : “hey please bolden the text in this element for me!”. If the style attribute and the bold thing sound confusing to you, that is perfectly fine, it’s not something you should bother yourself about right now. We’d discuss css in-depth in the next part of this series.
The Block Container
The HTML block container is the <div></div> element. It houses whatever children are in it, and it’s usually used to show some form of separation between the contents of our HTML file. Now let us modify our bio webpage and put all our current content in a div. Our full code should now look like this:
<!DOCTYPE html>
<html lang="en">
<head>
   <title>The Awesome Layo</title>
</head>
<body>
   <h1>The Awesome Layo: A Bio</h1>
   <div id="bio-description"> <!-- new div -->
       <img src="img.jpg" width="200" />
       <p>Lorem <span style="font-weight: bold;"><!-- new span-->ipsum</span> ipsum dolor sit amet consectetur, adipisicing elit. Quibusdam cum non veritatis in reprehenderit, voluptatibus nam. Distinctio enim fugit, eum, culpa sit quas deleniti numquam laudantium repudiandae porro, saepe nobis!</p>
       <h2>Things Layo is good at.</h2>
       <ol>
           <li>Swimming</li>
           <li>Fortnite</li>
           <li>Coding</li>
       </ol>
       <ul>
           <li>Drinking (apple juice, I won three apple juice drinking contests)      </li>
           <li>Skiing</li>
           <li>Sleeping</li>
       </ul>
   </div>


</body>
</html>
You can see the new div and new span highlighted by their respective comments in the code. Save and reload the page and you should notice a slight change, the bolder text within the span should be the only recognizable difference.
I didn’t forget the new HTML attribute we added to the div, the id attribute. This is one of the most important attributes in HTML. It’s used to give elements a unique identifier, or id for short, hence the name. In our case, “bio-description” is the identifier.The identifier could be used by css and javascript, we’d discuss that in other blog posts, not this one.
A nifty trick
Let’s say your name, like mine has a cool definition on urban dictionary, you could add a link to that in your webpage so that once your name is clicked, the cool definition opens.
This is done using the anchor element (<a></a>). Using this element is very simple, we put the link text in the element child and the link address in the href attribute of the element. Something like this:
<a href="https://www.google.com">google.com</a>
Simple enough! So let’s put it in in our page. Replace all occurrences of your name with an anchor tag and it should look like this:
<!DOCTYPE html>
<html lang="en">
<head>
   <title>The Awesome Layo</title>
</head>
<body>


   <h1>The Awesome <a href="https://www.urbandictionary.com/define.php?term=Layo">Layo</a> A Bio</h1>
   <div id="bio-description"> <!-- new div -->
       <img src="img.jpg" width="200" />
       <p>Lorem <span style="font-weight: bold;"><!-- new span-->ipsum</span> ipsum dolor sit amet consectetur,
            adipisicing elit. Quibusdam cum non veritatis in reprehenderit, voluptatibus nam. Distinctio enim fugit,
             eum, culpa sit quas deleniti numquam laudantium repudiandae porro, saepe nobis!
       </p>
       <h2>Things <a href="https://www.urbandictionary.com/define.php?term=Layo">Layo</a> is good at.</h2>
       <ol>
           <li>Swimming</li>
           <li>Fortnite</li>
           <li>Coding</li>
       </ol>
       <ul>
           <li>Drinking (apple juice, I won three apple juice drinking contests) </li>
           <li>Skiing</li>
           <li>Sleeping</li>
       </ul>
   </div>


</body>
</html>
In the browser it should look like this:

We can see an underline, and a blue-purple color to signify the name is a link. Once you click on it, it opens the urban dictionary page for my lovely name. We can also make the page open in a new tab by adding a new target attribute, with the value _blank like so:
<a href="https://www.urbandictionary.com/define.php?term=Layo" target="_blank" >Layo</a><!---opens in a new page->
There, our cool bio is done and dusted. Could we use anything to make it look cooler? We could probably let our friends tell us what they think about us, whether they find the page as cool as we do. We can do this using forms.
HTML Forms
HTML Forms are very similar to normal everyday forms, we’d be going through a few HTML form elements and also create a form to collect information about people who viewed our bio.
Inputs and Label
Almost every form you’d see has an input and a label, both are some of the most common HTML elements you can find.
Input elements can be used to create a number of form elements: fields, radios, buttons, e.t.c
Before adding our form, let us create another div after our div with the id=”bio-description”, we can give this div an id of “contact-form”. Try to write this yourself without checking what the code would look like, it’s perfectly fine to not get it, feel free to check what it looks like below;
...
   <div id="contact-form"></div>
...
Anatomy of an input tag
Here is an example of a standard input tag:
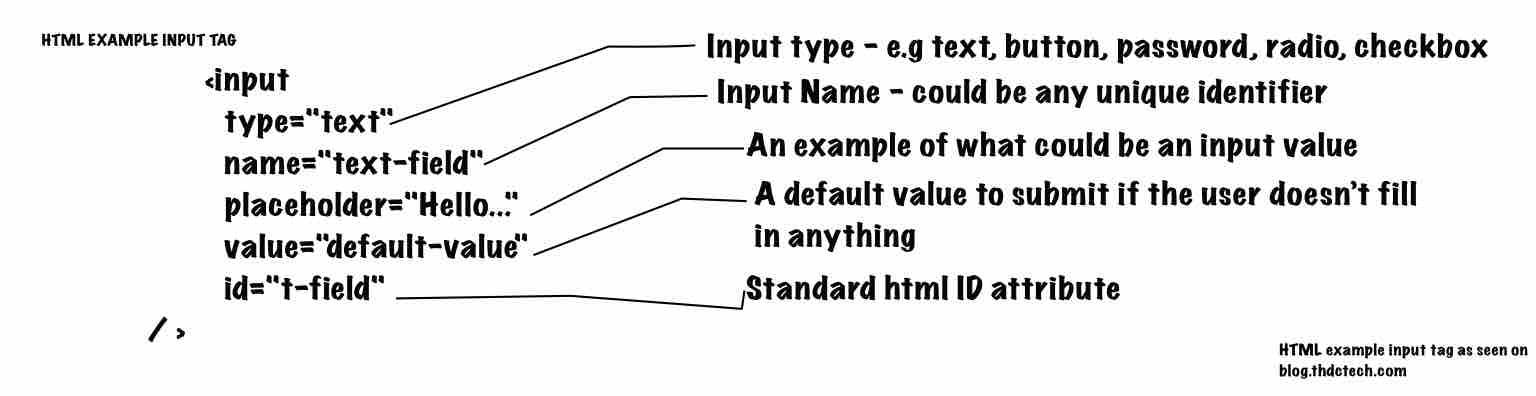
Each input we’d use in our form will be different in a couple of ways. We’d explain any changes along the way: The information we’d be collecting from whoever visits our page will be their:
- Full Name
- Age Range
- Gender
- What do they think of our bio site?
Ready? Let’s begin!
Text Field
A text field is an HTML element of type text, it basically looks like the element in fig(the fig up). Let us add one for a full name as a child for our div with the “contact-form” id:
<input type="text" name="fullname" placeholder="Johnn Doeo" id="ct-fullname" / >
It would look like this in the browser:
Email Field
Next up, we create an email field. To do this, we simply add an input field with the type “email” and that’s it. Our HTML for our email looks like this:
<input type="email" name="email" placeholder="jonny@doe.com" id="ct-email" / >
This field will actually validate that the reader entered a proper email when the form is submitted. Usually, we’d need some Javascript to do that but thanks to the HTML5 API, we don’t anymore.
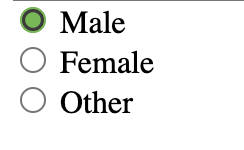
Radio Buttons.
Let’s ask the reader to select their gender, to avoid any ambiguity, we’d have three options, Male, Female, Other. To do that, we would use radio buttons. Radio buttons are a bit different from other input elements, as we can have multiple with the same name. In fact, when we create radio buttons, every radio button for a field must have the same name. Before adding the radio buttons to the webpage, we would create a div to house them, we’d also give the div an id of “gender-radio”, not the best name, I know. Our radio button code should look something like this:
<div id="gender-radio">
           <input type="radio" id="gender-male" name="gender" value="m">
           <label for="gender-male">Male</label><br />


           <input type="radio" id="gender-female" name="gender" value="f">
           <label for="gender-female">Female</label><br />

           <input type="radio" id="gender-other" name="gender" value="0">
           <label for="gender-other">Other</label>
</div>
In the browser, it should look like this:
There are a few new things in the above code.
- Label: This element acts as a label for input elements whose “id” attribute is said label’s “for” attribute e.g. To create a label for an element with id of “something” your label tag has to have a “for” attribute with the value “something” too. Labels help label input elements and can be used for elements with or without placeholders.
- Br: This is a break tag, they basically ask the browser to start the next content on a new line i.e. a single line break.
Every other thing should look familiar or self-explanatory. Also, with radio buttons, the “value” attribute is the value the form field takes when the button is selected.
We could actually remove the
<br />tags and let all the radios stay on one line. It’s not perfect, but I sorta prefer that.
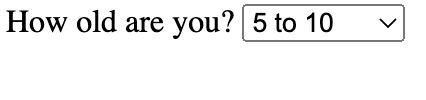
Select Fields
It’s time to ask the readers what their age is, so we know whether they’re cool enough for us to consider what they think of our site.
Introducing the select element. When we use it with the ‘option’ element, we end up creating a dropdown.
The select element works thus: you create a <select></select> parent, then all its children are <option></option> elements with the values you want to add. For our dropdown let’s look at three age ranges, 5 -10, 10-12, 13-17, 18 and up. Our Select field is going to look like this:
<div id="age-range">
     <label for="age-range-select">How old are you?</label>
     <select id="age-range-select">
          <option value="5_10">5 to 10</option>
          <option value="10_12">10 to 12</option>
          <option value="13_17">13 to 17</option>
          <option value="18+">18 and up</option>
     </select>
</div>
I wrapped the select element in a div with an id of “age-range”. You can see I also added a label to the form to ask the age of the reader. In the browser it should look like this when nothing is selected:
And look like this when we are trying to select an option:

Checkboxes
Checkboxes let us specify multiple options for the user, but unlike the radio, they can choose multiple boxes too. Like most of the form fields with multiple options. Our checkbox is going to let us ask the user what they think of our website, but only let them select the specific words we allow in the form. To create a checkbox, you just write a usual html input element, but with the type of “checkbox”. The checkbox code looks something like this:
<div id="bio-thoughts">
    <p> What comes to your mind when you read through this bio?</p>
    <input type="checkbox" id="cool" name="cool" value="cool ">
    <label for="cool"> It's cool</label><br>
    <input type="checkbox" id="tasteful" name="tasteful" value="tasteful">
    <label for="tasteful"> It's Tasteful</label><br>
    <input type="checkbox" id="edgy" name="edgy" value="edgy">
    <label for="edgy">It's Edgy</label><br>
</div>
And the browser display looks like this:

Now you could try to select any or all of the options. And the form lets you.
Textarea Element
The text area element is basically a big box of text, very similar to an input field but it helps us write multiple lines of text. Since textarea is a bit different from all the other form elements, I’d write the code first and then explain it.
<div id="review">
    <label for="honest-review">Leave a honest review of this bio:</label><br />
    <textarea id="honest-review" name="review" rows="4" cols="50" placeholder="This is a really cool bio. You're hotstuff Layo!"></textarea>
</div>
As we see, we add the textarea element, using its own tag and not an input tag. Also the rows attribute specifies how long we want the text area to be while the cols attribute specifies how wide we want it to be.
Since it’s not an element with a self-closing tag, you might be wondering what the child of a text area looks like, but it’s basically placeholder text. Also, the placeholder attribute is in the textarea opening tag, here is the difference. The text in the textarea child is the value of the textarea field, while the text in the placeholder attribute isn’t, so if you want to make what placeholder text the default value, you make it a child of the textarea like so:
<textarea id="honest-review" name="review" rows="4" cols="50">
This is a really cool bio. You're hotstuff Layo!
</textarea>
Now that’s a different look!
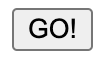
Finalizing
Everything looks nice, but it’s missing something, a submit button. We can create that easily by adding an input with the type “submit” and a value of whatever text we want our submit button to have. So it’s code looks like this:
<input type="submit" value="GO!" />
On the browser, it looks like this:
Nice right? Now why don’t you try clicking the button and see what happens, nothing happens.
That’s because we missed the most crucial element that makes a form a form and that is the form element.
All our input, select, textarea e.t.c. elements should be children of the <form></form> element and not a div. Let’s change our div with the “contact-form” id to a form and we should be set. Our full form code should look like this:
<form id="contact-form">
       <input type="text" name="fullname" placeholder="Johnn Doeo" id="ct-fullname" / >
       <input type="email" name="email" placeholder="jonny@doe.com" id="ct-email" / >
       <div id="gender-radio">
           <input type="radio" id="gender-male" name="gender" value="m">
           <label for="gender-male">Male</label>


           <input type="radio" id="gender-female" name="gender" value="f">
           <label for="gender-female">Female</label>


           <input type="radio" id="gender-other" name="gender" value="0">
           <label for="gender-other">Other</label>
       </div>
       <div id="age-range">
           <label for="age-range-select">How old are you?</label>
           <select id="age-range-select">
               <option value="5_10">5 to 10</option>
               <option value="10_12">10 to 12</option>
               <option value="13_17">13 to 17</option>
               <option value="18+">18 and up</option>
           </select>
       </div>
      <div id="bio-thoughts">
           <p> What comes to your mind when you read through this bio?</p>
           <input type="checkbox" id="cool" name="cool" value="cool ">
           <label for="cool"> It's cool</label><br>
           <input type="checkbox" id="tasteful" name="tasteful" value="tasteful">
           <label for="tasteful"> It's Tasteful</label><br>
           <input type="checkbox" id="edgy" name="edgy" value="edgy">
           <label for="edgy">It's Edgy</label><br>
      </div>
      <div id="review">
           <label for="honest-review">Leave a honest review of this bio:</label><br />
           <textarea id="honest-review" name="review" rows="4" cols="50">This is a really cool bio. You're hotstuff Layo!
           </textarea>
       </div>
       <input type="submit" value="GO!" />
   </form>
To see wether there is a difference, on the browser you can enter a non-email in the email field and then press the enter/return button. It should give you an error like this:

It wouldn’t have previously done that.
Now to test if the form is working, we do something simple: fill the form in the browser then, click the go button or press the enter/return button. The page seems to blip for a second but nothing shows? Check the url of the website, it should look different, like this:

This is because the form tries to get submitted but, we haven’t told it where to submit it. We will handle that in a later article.
This marks the end of the HTML tutorial. I hope you’ve been able to pick up one or two things.
Never mind that the page looks very wonky right now, in the css tutorial, we’d style it up and make it look somewhat professional. while in the javascript tutorial, we would create a way to save information submitted to the form. Bye for now!
Leave a Reply