Creating a Tic-Tac-Toe Game
.
12 minutes
This article is a step-by-step guide on creating a Tic-Tac-Toe game using Svelte and SvelteKit. This tutorial will guide you through the entire process, from understanding the game’s rules to building a fully functional game. So, by the end of this guide, you’ll not only have a working Tic-Tac-Toe game but also a good understanding of Svelte and SvelteKit
Understanding Tic-Tac-Toe
Tic-Tac-Toe, also known as “Xs and Os,” is a popular two-player game played on a 3×3 grid. The objective of the game is to be the first to complete a row, column, or diagonal with your symbol (‘X’ or ‘O’). Sounds quite simple to understand right? But it does have some hidden complexities. Now, let’s break down the rules and mechanics:
Rules of Tic-Tac-Toe:
- The game is played on a 3×3 grid.
- Two players take turns, one using ‘X’ and the other ‘O.’
- The first player to form a horizontal, vertical, or diagonal line with their symbol wins.
- If all squares are filled, and no one has won, the game ends in a draw.
Why Tic-Tac-Toe Matters:
Tic-Tac-Toe GAME serves as an excellent starting point for learning in web development because it touches on crucial concepts that programmers implement in real world scenarios:
- User interaction: Players click on squares to make their moves, and this illustrates fundamental UI/UX principles.
- Game logic: Implementing winning conditions and detecting a draw involves logical thinking.
- State management: Keeping track of the game board and player moves is merely about storing data and accessing them to use as desired. And that is a foundational concept in programming. Understanding these rules are important as they form the basis of the game’s logic. Now, let’s explore why we are even using Svelte and SvelteKit in building this game.
Why Svelte & SvelteKit?
Svelte and SvelteKit are the dynamic duo for web development. So why are they the perfect choice for creating your Tic-Tac-Toe game? Well, Svelte is a front-end framework that’s lightweight, efficient, and incredibly intuitive which is amazing for web developers. That is because Svelte compiles your code at build time, leading to small and fast bundles. It’s a game-changer for responsive and performant web applications. Here’s a practical example of Svelte reactivity system, which is a vital feature that sets it apart:
<script>
  let count = 0;
  function increment() {
    count += 1;
  }
</script>

<button on:click={increment}>Increment</button>
<p>The count is {count}</p>
In the above example, every time the button is clicked, the count variable is updated, and the change is automatically reflected in the DOM without a virtual DOM. This reactivity is a game-changer for creating efficient and responsive user interfaces.
SvelteKit:
Sveltekit is a tool powered by Svelte and uses a compiler to write concise components for the browser. It’s built on top of Svelte and simplifies essential aspects of web development.
Here’s what it handles:
-
Routing: SvelteKit takes care of routing for you. You define routes, and it ensures that the right component is displayed for each URL.
-
Server-Side Rendering (SSR): SSR is a critical feature for optimizing web applications. SvelteKit provides SSR support out of the box, ensuring your site loads quickly and is SEO-friendly.
-
API Endpoints: If your game requires interactions with external data or services, SvelteKit makes it easy to create API endpoints.
So, with SvelteKit, you can focus on building your game without getting lost in complex configurations. It’s like having a personal assistant that handles the mundane tasks, allowing you to focus on implementing your solutions in code.
Now, let’s hop onto the practical side of things by setting up your development environment.
Setting Up Your Development Environment
Before you can start building your Tic-Tac-Toe game, you need to prepare your development environment. This involves setting up the tools and libraries necessary for the development process. Here’s a step-by-step guide which you can use for setting up:
1. Node.js and npm
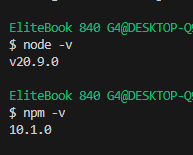
Node.js is the runtime environment for JavaScript, and npm (Node Package Manager) is the package manager for Node.js. If you don’t have them installed, visit nodejs.org and download the recommended version for your operating system. To check if Node.js and npm are installed, open your terminal or command prompt and run the following commands:
node -v
npm -v
If you see version numbers for both Node.js and npm as can be seen in the image below, you’re good to go.
2. Code Editor
You will also need a code editor to write your HTML, CSS, and JavaScript code. Some popular code editors include:
- Visual Studio Code
- Sublime Text
- Atom
- Notepad++
The most popular is Visual Studio Code. You can choose the one you’re most comfortable with or try out a few to see which one suits you best.
3. Git
While not mandatory, version control is a good practice, especially if you’re working on a project that might evolve over time. Git is a powerful tool for tracking changes in your code. You can use services like GitHub or GitLab to host your project and collaborate with others. With your development environment set up, you’re ready to start building your Tic-Tac-Toe game.
Now, let’s get started proper.
Step 1: Setting Up Your Svelte Project
Create a New Svelte Project
- Open your terminal or command prompt and run the following command. Replace “my-tic-tac-toe” with your desired project name:
npm create svelte@latest tictactoe
This command clones the official Svelte template into a folder with your chosen project name. You will be prompted with this command.
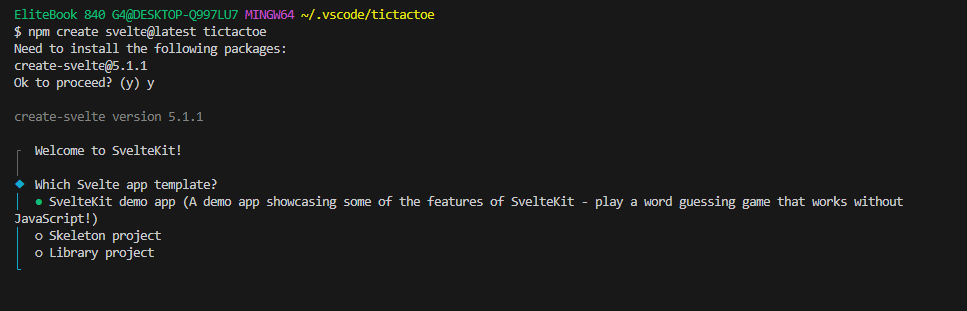
Then you can proceed with SvelteKit as that is what we will be working with. You will be prompted on either to add type checking with javascript, as well as the environment to work with. For the purpose of this article, we will go with “No” for the type checking and vite as the environment. After a few seconds, you will see a prompt that indicates that the scaffold of the project is ready as seen in the image below.
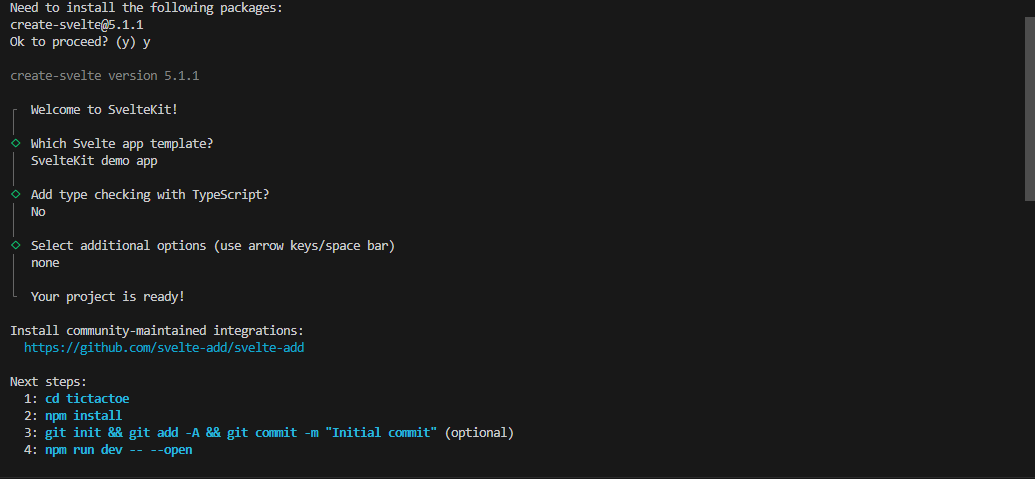
Navigate to Your Project Folder The next step will be to install the dependencies and to do that, you need to change your current directory to the project folder. So to do that, you can run the following command.
cd tictactoe
Install Dependencies Now, you can install the project dependencies by running the command below:
npm install
This step sets up the necessary libraries for your Svelte project. When the installation is done, run this command:
npm run dev -- --open
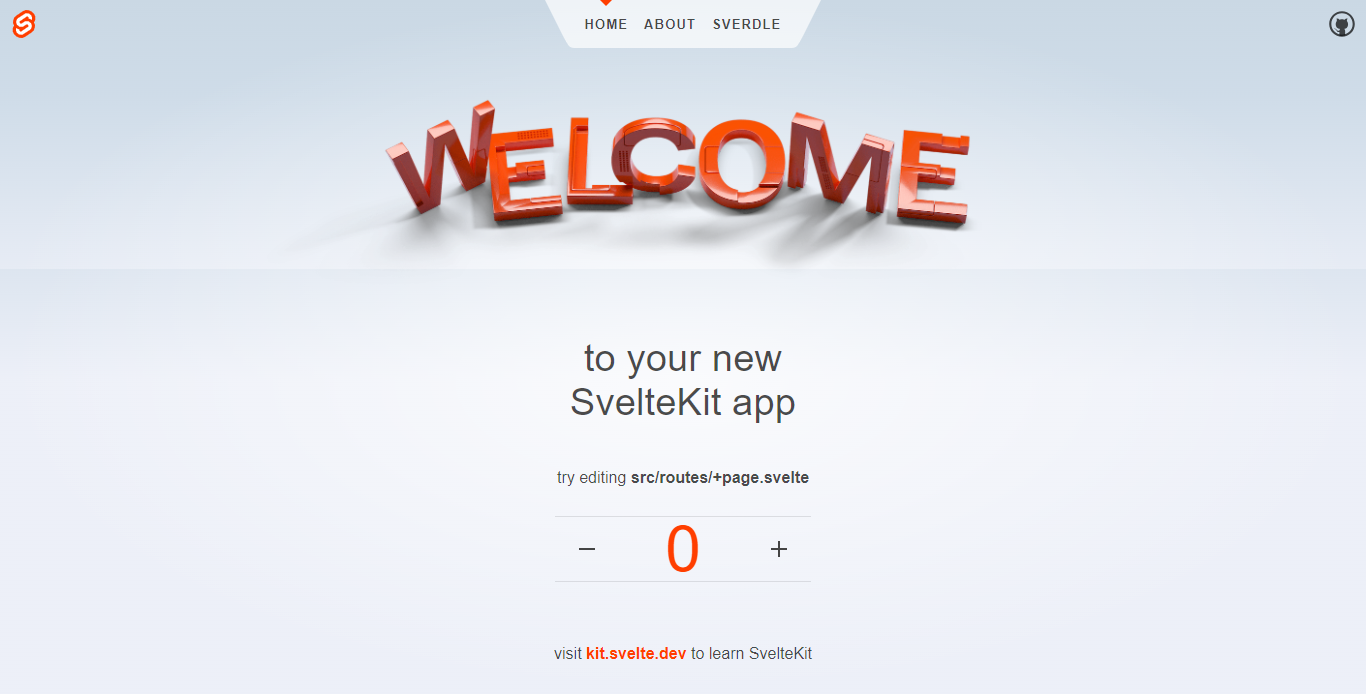
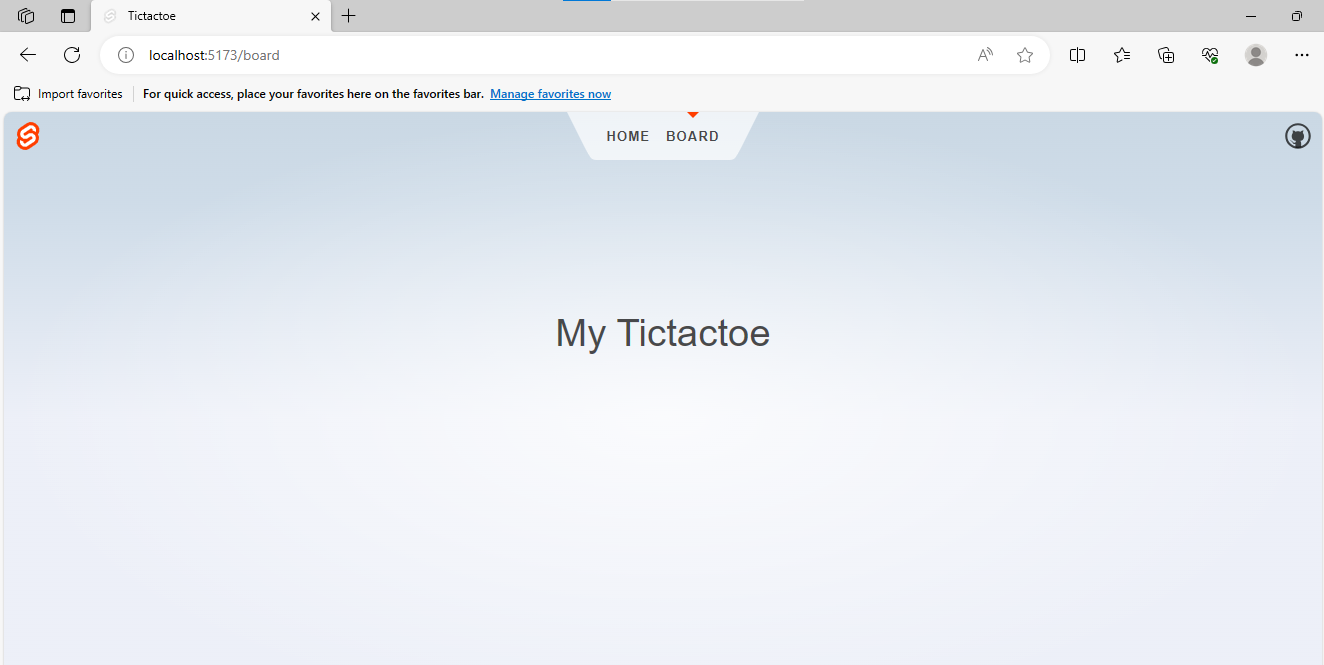
You've now successfully initialized your Svelte project. Your local development environment should be running on localhost:5173.
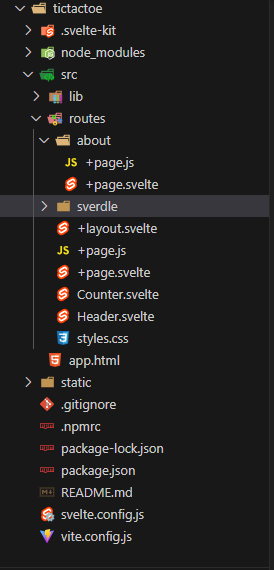
You will come across this folder structure in the image below:
The next step is to build the game board component.
Step 2: Building the Game Board Component
In order to do this, we need to set up the board route first. In SvelteKit, you have a project structure that includes `routes` where each route is represented by a `.svelte` file. The `app.html` file acts as your page template, and it’s shared across all routes.
For this Tic-Tac-Toe game, you can structure your project as follows:
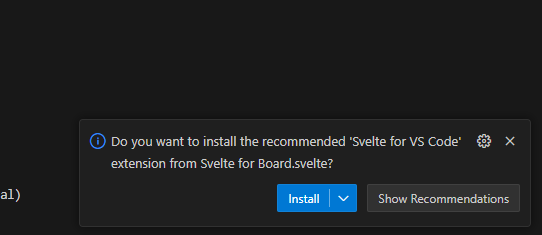
Inside the `src/routes` directory, create a directory called board. Then you can create a new `.svelte` file, like so, `+page.svelte`. If you are using vscode, you would be prompted to install the recommended extension for svelte.
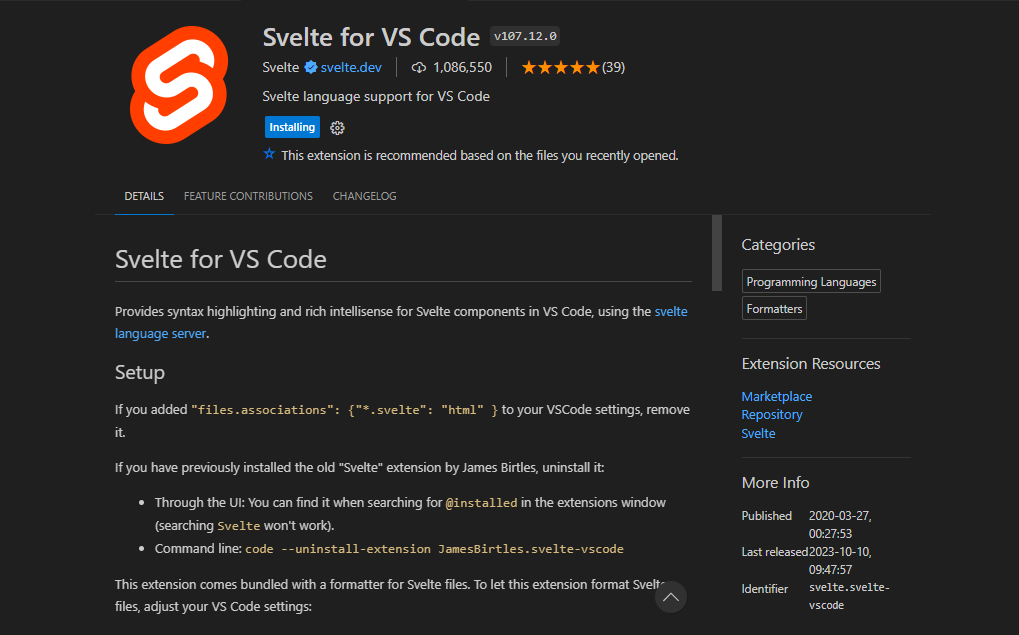
And this is the extension you will install in your IDE.
So, if you click on the `Header.svelte` file in the src directory, you can add this line of code to the `nav` section in order to be able to navigate to the Board route from the Home `/` route like so:
	<li aria-current={$page.url.pathname === '/board' ? 'page' : undefined}>
				<a href="/board">Board</a>
			</li>
So, your home page should have this anchor tag that can navigate you to the board as seen here.

Now, you can open “+page.svelte” in your code editor and define the structure of the game board. This is where players will make their moves, and the game will be played. Here’s a basic structure to get you started:
<script>
// Define the game board logic here
</script>

<svelte:head>
	<title>Tictactoe</title>
	<meta name="description" content="Svelte  tictactoe app" />
</svelte:head>

<section>
	<h1>My Tictactoe</h1>
</section>
<style>
	section {
		display: flex;
		flex-direction: column;
		justify-content: center;
		align-items: center;
		flex: 0.6;
	}
	h1 {
		width: 100%;
	}
</style>
Code explanation
In the above code, the <script> block is typically used for JavaScript code in Svelte components. The commented section is a placeholder for future JavaScript code that will be added to this component.
Then, the <svelte:head> section is used to define the document’s <head> content. It sets the page’s title to "Tictactoe ‘’ and provides a meta description for the Svelte tictactoe app. This is important for SEO and browser behavior. Following it defines the structure of the web page. It includes a <section> element that is used to group content. Inside the section, there’s an <h1> heading with the text “My Tictactoe.” This would be the main title or header of the webpage. We also have the <style> block which contains CSS code that styles the HTML elements. In this case, it’s targeting the <section> and <h1> elements.
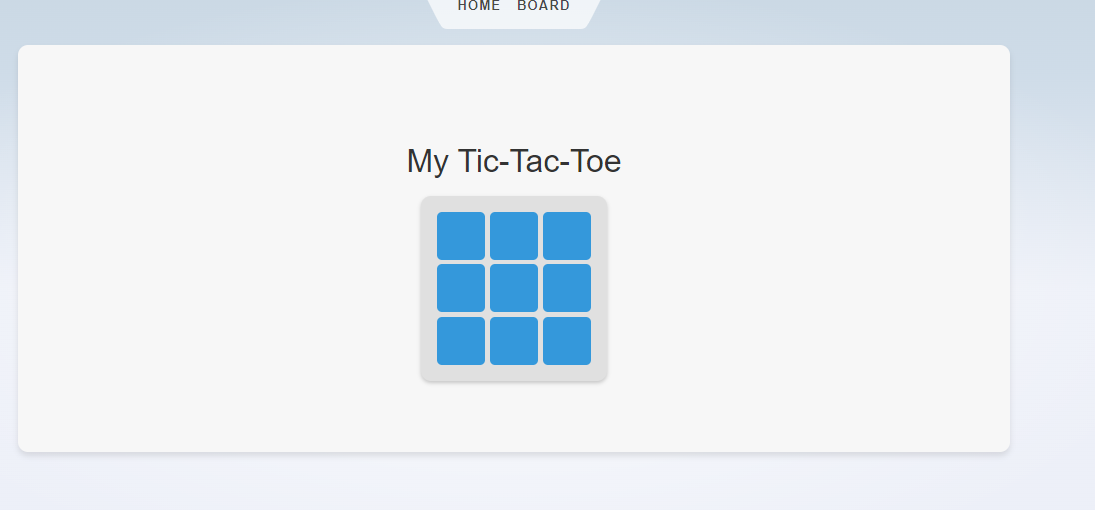
Your UI for this board route should look like this.
Javascript logic for TicTacToe Logic 1: Initializing Game Variables
let buttons = new Array(9).fill(null);
let result = null;
let turn = 'X';
const winCombinations = [
  [0, 1, 2],
  [3, 4, 5],
  [6, 7, 8],
  [0, 3, 6],
  [1, 4, 7],
  [2, 5, 8],
  [0, 4, 8],
  [2, 4, 6],
];
In the logic, we initialize key game variables:
buttons: An array representing the game board with 9 squares initially filled with null. Each square will be updated with ‘X’ or ‘0’.
result: A variable to store the game result, initially set to null.
turn: Tracks whose turn it is, starting with ‘X’.
winCombinations: An array that defines all possible winning combinations in the game.
Logic 2: Setting the Square
function setValue(i) {
  buttons[i] = turn;
  buttons = [...buttons];
  turn = turn == 'X' ? '0' : 'X';

  if (!buttons.includes(null)) {
    result = 'No winner';
  } else {
    calculateWinner();
  }
}
This logic defines the setValue(i) function, which is called when a square is clicked:
It assigns ‘X’ or ‘0’ to the clicked square based on the turn.
The buttons array is updated by creating a new array to trigger reactivity in Svelte.
It toggles the turn between ‘X’ and ‘0’.
It checks if there are no empty squares left; if so, it sets the result to ‘No winner’. Otherwise, it calls the calculateWinner() function to determine if there’s a winner.
Logic 3: Calculating the Winner
function calculateWinner() {
  for (let i = 0; i < winCombinations.length; i++) {
    if (buttons[winCombinations[i][0]] !== null) {
      if (
        buttons[winCombinations[i][0]] == buttons[winCombinations[i][1]] &&
        buttons[winCombinations[i][1]] == buttons[winCombinations[i][2]]
      ) {
        result = 'Winner' + buttons[winCombinations[i][0]];
        break;
      }
    }
  }
}
The calculateWinner() function checks for a winner by iterating through the winCombinations array:
It ensures that the first square of the winning combination is not null.
It checks if all three squares in the combination have the same value (‘X’ or ‘0’).
If a winning combination is found, it sets the result to ‘Winner’ followed by the symbol (‘X’ or ‘0’) of the winner and exits the loop.
Logic 4: Restarting the Game
function restart() {
  buttons = new Array(9).fill(null);
  result = null;
  turn = 'X';
}
The restart() function is called to reset the game:
It sets the buttons array to a new array with 9 empty squares.
It resets the result to null.
It sets the turn back to ‘X’.
This completes the core logic of the Tic-Tac-Toe game, allowing players to make moves, calculating the winner, and providing a way to restart the game.
HTML Structure Setup
Setting up the Game Heading
<h1>My Tictactoe</h1>
The above title is displayed at the top of the game interface, indicating the game’s name as aforementioned. Conditional Display of Game Board or Result
{#if !result}
<!-- If there's no winner yet, display the game board here→
(/if)
This code above uses conditional rendering to check if there’s no winner yet (!result). If that’s the case, it displays the game board.
Game Board Display
<div class="board">
  <div class="grid">
    {#each buttons as button, index}
      <button
        on:click={() => setValue(index)}
        disabled={button !== null}
      >
        { button || '' }
      </button>
    {/each}
  </div>
  {#if result}
    <p>{result}</p>
  {/if}
</div>
The above code is where the game board is displayed within the if check. It consists of a grid of buttons, each representing a square in the Tic-Tac-Toe board.
The {#each ... {/each} block iterates over the buttons array to create buttons for each square.
The on:click event handler is used to call the setValue(index) function when a button is clicked.
The disabled attribute is set based on whether a square is already filled or not.
The text content of each button is either ‘X’ or ‘0’ depending on the value in the buttons array.
If there’s a result (a winner), it is displayed below the game board.
So, this is the UI of the screen when there is no winner.
/
Conditional Display of Game Result and Restart Button
{:else}
<!-- If there is a winner, display the result and a restart button -->
{result}
<button
  on:click={restart}
>
  Restart
</button>
The part above handles the display when there’s a winner. If a result exists, it is displayed, indicating the winner. A “Restart” button is also provided to start a new game. This is how the UI would look like:

So, the above HTML structure creates an interactive game interface for playing Tic-Tac-Toe, with conditional display based on whether there’s a winner or not. The game board is interactive, and the result is shown when the game ends. Styling the TicTacToe with CSS
<style>
	section {
		display: flex;
		flex-direction: column;
		justify-content: center;
		align-items: center;
		flex: 0.6;
		background-color: #f7f7f7;
		padding: 2rem;
		border-radius: 10px;
		box-shadow: 0 4px 6px rgba(0, 0, 0, 0.1);
	}

	h1 {
		width: 100%;
		font-size: 2rem;
		text-align: center;
		color: #333;
		margin-bottom: 1rem;
	}

	.board {
		background-color: #e0e0e0;
		border-radius: 10px;
		padding: 1rem;
		box-shadow: 0 2px 4px rgba(0, 0, 0, 0.2);
	}

	.grid {
		display: grid;
		grid-template-columns: repeat(3, 3rem);
		grid-template-rows: repeat(3, 3rem);
		grid-gap: 0.3rem;
	}

	button {
		font-size: 1.2rem;
		font-family: 'Arial', sans-serif;
		padding: 0.5rem 1rem;
		background-color: #3498db;
		color: #fff;
		border: none;
		border-radius: 5px;
		cursor: pointer;
		transition: background-color 0.3s ease;
	}

	button:hover {
		background-color: #2980b9;
	}
</style>
Code explanation.
The provided CSS styling defines the appearance of a web page created with Svelte Kit. It begins by structuring the layout, using a flex-based section element that centers its content both vertically and horizontally. The styling features rounded corners, subtle shadows, and a light gray background, giving the section a polished look. The h1 heading within the section spans the full width, aligns the text centrally, and uses a larger, dark gray font.
Elements with the .board class adopt a similar rounded look with a lighter gray background and a subtle box shadow. The .grid class introduces a 3×3 grid layout with specified column and row sizes and a small gap between items. Buttons receive enhanced styling with a larger font, custom font family, padding, and a sophisticated blue background, turning white upon a click, and transitioning to a slightly darker shade when hovered over. Collectively, these styles contribute to a more refined and visually appealing web interface as seen in the image below.

Now, you can play the game, and it should correctly determine the winner or indicate that there is a draw.

But the journey doesn’t end here. There are numerous ways to add extra functionalities to your game and improve the user experience.
Further Enhancements
A Tic-Tac-Toe game is a great way to understand the nuances in Svelte but you can take it a step further. Here are some ideas that we can enhance our game with:
- Win Counter: Keep track of each player’s wins to add a competitive edge to your game. Displaying the number of wins for each player will help to encourage more gameplay. To implement a win counter, you can create variables to store the win count for each player and update them whenever a player wins a game. Here’s a basic example:
<script>
  // ... (previous code)
  function setValue(i) {
    // Store the previous state before updating
    previousStates.push([...buttons]);

    buttons[i] = turn;
    buttons = [...buttons];
    turn = turn == 'X' ? 'O' : 'X';

    if (!buttons.includes(null)) {
      result = 'No winner';
    } else {
      calculateWinner();
    }
  }

  function calculateWinner() {
    // ... (previous code)
  }

  function undo() {
    if (previousStates.length > 0) {
      // Restore the previous state
      buttons = previousStates.pop();
      result = null;
      turn = turn == 'X' ? 'O' : 'X';
    }
  }

  // ... (remaining code)
</script>
Then, in the html section, you can add this to the existing html code
<div>
  <p>Player X Wins: {playerXWins}</p>
  <p>Player O Wins: {playerOWins}</p>
</div>
- Undo functionality. Suppose you make a wrong move, you can modify the game to revert to the previous move made by a player. So, to make this work, we can create a function that accepts the current move and then remove it from the existing data that had been stored. This is how that will look like:
function undo() {
    if (previousStates.length > 0) {
      // Restore the previous state
      buttons = previousStates.pop();
      result = null;
      turn = turn == 'X' ? 'O' : 'X';
    }
  }
Then, we will add a button to the html section in order to execute this function.
<!-- Sub-Logic 5: Undo Button -->
<button on:click={undo} disabled={result !== null}>
  Undo
</button>
For full access to this code, you can checkout the repository here.
Conclusion
And there you have it. In this tutorial, you’ve learned how to create a Tic-Tac-Toe game using Svelte and SvelteKit. We covered key aspects, from understanding the game’s rules to building a functional game with an appealing user interface. You’ve grasped the fundamental concepts of web development, including user interaction, game logic, state management, and responsive design with Svelte. To further your knowledge, you can check out these additional resources:
-
Svelte Documentation: Learn more about Svelte and explore its features.
-
SvelteKit Documentation: Learn more about SvelteKit and how it can simplify your web development projects.
Leave a Reply